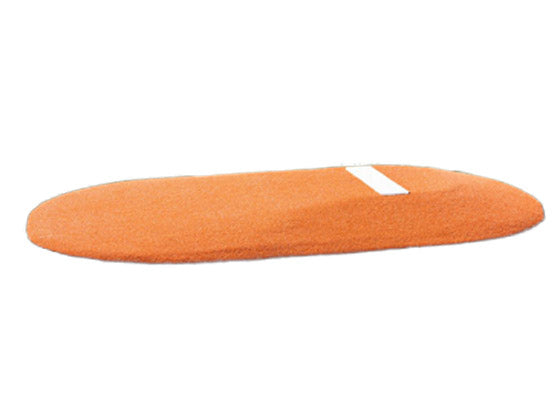
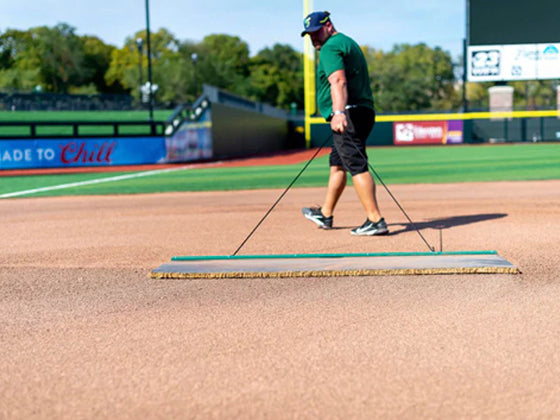
Step-by-Step Guide: How to Build a Pitching Mound Like a Pro
Embarking on building your a pitching mound? This definitive guide strips down the process to its core, showing you exactly how to build a pitching mound that aligns with league standards and ensures player safety. You’ll discover not just the ‘how’ but also the ‘why’ behind each step, empowering you to create a mound that’s both durable and professional.
Key Takeaways
-
Creating a pitching mound involves careful consideration of location, size, and league standards, ensuring a safe and functional mound that adheres to the regulations of the players’ league.
-
The mound construction process includes preparing the site, leveling, and layering fill dirt with a high clay content, correctly installing the pitching rubber, and ensuring the plateau is accurately measured and formed.
-
Ongoing maintenance is essential for preserving the mound, which includes applying infield conditioner to maintain moisture, covering the mound with a tarp to protect it, and conducting routine maintenance to uphold its quality and safety for players.
Recommended Tools for the Job
-
Tape Measure
- Mound Slope Gauge
-
Large Nail or Spike
-
Frame for Plateau Reconstruction
-
Square-faced Shovel or Spade
-
Pick
-
Landscape Rake
-
Two-foot Carpenter's Level and Carpenter's Square
-
1" x 4" (4' long)
-
2" x 4" (10' long)
-
Mound Slope Board
-
Wheelbarrow
-
Mound Building Clay
-
Specialty Packing Clay
-
Tamp or Vibrating Asphalt Compactor
-
Four-Sided Rubber
Determining the Ideal Location and Size
Imagine a perfect day with the sun overhead as you set out to construct your personal pitching mound. Before you take that first shovel of dirt, it is essential to evaluate the best location and dimensions for your mound. This task transcends merely choosing a random spot. Several critical considerations must be made to guarantee that the mound meets safety standards, operates effectively, and aligns with league regulations.
The significance of finding flat terrain cannot be overstated when it comes to where you’ll place your mound. Ensuring that pitchers have a stable and level surface underfoot is key in reducing injury risks during gameplay and increasing overall enjoyment on the field. It’s equally important that around home plate there exists an unvarying circular area with 26 feet in diameter so both batter’s boxes and catcher’s stance are flush with home plate.
Note: If you're not sure what your league's field dimensions are check out our baseball field dimensions guide and our softball field dimensions guide.
Keep top of mind when designing your pitching site - a pitcher mounds may evolve over time along with players’ growth in age and skill levels: this includes proportional adjustments not only to the height of the mound, but also scaling field size appropriately based on evolving capabilities among athletes as well as adhering strictly according to established league criteria.
Ensuring Proper Orientation
Ensuring the pitcher’s mound is properly aligned is essential for ideal playing conditions. To achieve this, the line extending from home plate, passing over the mound and continuing to second base should be directed east-northeast. Proper alignment of the mound is vital to prevent batters from having to face into the sun during play, which can impair their ability to perform well.
Throughout the process of constructing a pitcher’s mound, it’s crucial to regularly check that its orientation adheres strictly to an east-northeast direction. This ongoing verification guarantees that players will not contend with sunlight interference during games.
Factors to Consider
Embarking on the task of constructing a DIY pitching mound requires collecting essential items like clay bricks, commercial-grade clay, and protective mound tarps to guarantee both durability and optimal performance. The critical measurements for a standard pitching mound must be adhered to: an 18-foot diameter complemented by a height of 10 inches as well as an incline commencing six inches before the pitching rubber. Keep in mind that the longevity of your constructed mound will largely hinge upon specific local environmental conditions such as soil composition and precipitation levels.
For this venture into building your own mound, make sure you have all necessary equipment at hand - tampers, shovels, rakes, and wheelbarrows are indispensable tools that will greatly aid you during the construction process.
League Requirements
Regarding the regulations of the league, it is critical that your pitcher’s mound adhere to established norms for both home advantage and fairness. From high school up to Major League Baseball, it’s mandatory for the mound to have a diameter of 18 feet while standing 10 inches above home plate in height. The pitcher’s plate must also be precisely 24 inches by 6 inches at its front with an extension of 18 inches beyond each side of the rubber.
These meticulously defined measurements aren’t arbitrary. They are deeply rooted in baseball’s rich history and progressive development aimed at maintaining equilibrium between batter and pitcher within the game.
Age and Skill Level
The age and skill level of the players are critical factors to consider as well. The size of the mound differs depending on the player’s age category, making it crucial to make appropriate modifications. Youth league mounds tend to be smaller in height and diameter than those used by older participants. For adult play, a standard mound has a 10-inch elevation and extends 18 feet in diameter. Constructing the mound according to regulations provided by the particular league is important for ensuring both equitable competition and safety.
Alterations may need to be made based on player proficiency, which could include changes in both the height of the mound and its distance from home plate, so that it aligns with pitchers’ capabilities most effectively.
Preparing the Site

Having finished the planning phase, we now need to start actual work on the field. Establishing a flat surface for the pitcher’s mound is crucial as it not only emulates a real baseball diamond but also ensures players are safe from harm. This initial task involves utilizing fill dirt to elevate depressions and adjust gradients across the site, mitigating risks that come with an irregular playing area. Make sure you take a large level to make sure the entire area around the pitching mound will be level.
Excavating the Turf
Begin the construction process with these actions:
-
Identify and outline the location on the ground for your mound installation.
-
After delineating, remove any turf from this designated space, then even out and refine the soil’s surface underneath.
-
Apply landscape fabric to thwart weed growth within the mound area, securing it in place using landscape staples.
-
Taking this additional measure will alleviate potential issues down the line and help maintain your mound’s quality over time.
Leveling the Surface
You’ve prepared the groundwork for building a mound, which is a crucial aspect of creating an authentic professional baseball field atmosphere. This process not only helps prevent player injuries, but also ensures compliance with league regulations.
Although this phase may require meticulous care and some patience, it’s important to keep in mind that achieving a properly leveled mound will significantly improve the quality of your baseball gameplay by offering pitchers a stable and uniform surface.
Marking the Center
Initiating the construction process, one must accurately determine and mark the center of the pitcher’s mound. Make sure it aligns perfectly with both home plate and second base, which is imperative to building out a proper baseball field. Utilize alignment tools like a transit, laser, or string lines to achieve precise positioning between these key elements: the pitcher’s mound, home plate, and second base.
Equally important is the meticulous placement of the home plate. It should be installed as a perfect 17-inch square slab oriented such that its 17-inch side directly faces towards where the pitcher will stand while delivering pitches – this edge looks out toward what would technically be referred to as “the pitcher’s plate.” Meanwhile, ensure that each of its two shorter sides measuring 12 inches corresponds exactly with imaginary extensions emanating from first- and third-base lines respectively. Precision at this stage is critical. Every inch matters because laying down an accurate foundation here paves way for proper mound formation thereafter.
Constructing the Mound Base

Commence the construction of the mound base at the prepared site by applying clean fill dirt in layers, each an inch thick, until you reach the desired elevation. This type of soil is particularly suited for crafting a pitching mound since it’s devoid of organic content that might promote plant growth and thereby reduces weed management concerns.
Close to where the pitcher’s plate will be situated, erecting the pitcher’s mound requires dirt with substantial clay content. For enhanced stability and lasting resilience underfoot, experts advocate using specialty packing clay, especially in constructing both the mound table and landing zones.
Layering the Fill Dirt
When carrying out the layering process with precision, it’s essential to use soil with a high clay content. Employ bagged mound mixes and specialized packing clays in both the table and landing zones of the pitcher’s mound, ensuring that quality materials like a mix of clay fortified with desert sand are used for robust footing and extended durability.
For optimum stability and adherence to official mound specifications:
-
Deposit fill dirt incrementally in one-inch layers, compacting each firmly before introducing an additional layer.
-
Ensure that every new fill dirt layer is 3 to 6 inches less in diameter than its predecessor.
-
Continue this method until you reach both the required contour and elevation for the mound.
Key instruments necessary for properly installing mound clay consist of items such as a tamper, rake, shovel, water canister, and slope board.
Compacting Each Layer
Ensuring proper compaction of every fill dirt layer is crucial to prevent erosion or instability on the mound. Follow this procedure:
-
Place a one-inch thick layer of soil onto the pitching mound.
-
Use a tamper or compactor to solidify this layer thoroughly.
-
For each new fill dirt layer, replicate steps 1 and 2.
-
Persist with adding and compacting layers until you achieve your desired pitching mound height, thereby guaranteeing its stable base.
Although this task may require significant physical effort, bear in mind that with each forceful strike down into the earth, you’re moving closer to constructing an ideal mound.
Achieving the Required Height
Once the fill dirt is layered and compacted, one must confirm that the mound complies with the height mandated by baseball league standards. Although league's have different requirements, most pitcher’s mound specifications state:
-
It should be circular in shape and have an 18-foot diameter.
-
Its elevation needs to be 10 inches above home plate level.
-
Regulations mandate that the apex of the pitcher’s rubber stand at a height precisely 10 inches greater than that of home plate.
During construction, a central stake marker serves as an essential tool for indicating the precise elevation of the mound, guaranteeing meticulous adherence to specified height criteria.
Installing the Pitching Rubber and Plateau
Once the mound base has been prepared, it’s time to place and secure the pitching rubber while shaping the plateau. The following are steps that should be taken for properly positioning the pitching rubber:
-
Installations can involve either staking or slightly embedding the pitching rubber into your mound.
-
It needs to be exactly 60 feet, 6 inches from home plate’s back edge and must rest securely in position, perfectly level along both its length and width.
-
To ascertain whether you have placed it at dead center, draw a line through its middle.
-
Extend a string directly from home plate all way toward second base.
Having perfected and evened out your pitcher’s mound surface, go on with constructing a frame around where your plateau will sit, making sure it is of precise height by employing transit lasers or utilizing a strong string line method before ultimately removing said frame carefully post construction.
Building the Plateau
To construct a Little League pitcher’s mound plateau appropriate for Little League, it is critical to utilize mound clay or MoundMaster Blocks in its formation. This not only ensures structural stability but also adheres to precise dimensions required for play. The width of the plateau should span 5 feet while extending back 34 inches from the front edge and be positioned on a sub-base that measures 10 inches in height. Ensure that there is a depth of hard clay between 6 and 8 inches during construction to provide robust support suitable for pitching activities.
In order to achieve a level surface atop the pitcher’s mound plateau, employ what’s known as the two-board smoothing method. Utilize one board measuring four feet in length combined with another stretching ten feet specifically designed for finishing both edges and preparing an even landing area.
Crafting the Mound Slope
Once the home plate is secured, focus on sculpting the mound’s slope. The front slope of the mound should descend 1 inch per foot and be constructed using a harder clay to create its distinctive pie-shaped form. For other parts of the mound that are not included in this pie shape, use a standard infield mix.
For precise shaping of your mound’s frontal inclination, employ either a transit with laser leveling or simply utilize a string line for guidance. This will help you maintain accuracy throughout the construction process.
Applying Harder Clay
When constructing the front slope of the pitching mound, it’s advisable to use a harder variety of mound clay for enhanced stability which will benefit the pitcher during gameplay. For optimal results, utilize top-tier packing clays like Turface MoundMaster Blocks or Turface Professional Mound Clay due to their superior performance characteristics.
Depending on whether the pitchers are younger players or at high school, college, or professional level, ensure that you apply a depth of 4 inches for amateurs and 6 inches for more advanced pitchers when laying down your professional-grade mound clay. Each layer should be thoroughly compacted or rolled to solidify its structure—this is particularly crucial in areas subject to heavy usage such as the pitcher’s plateau and landing area on the mound.
Applying Infield Conditioner
It is essential to use an infield conditioner to maintain the integrity of the mound, ensuring reliable and safe playing conditions for pitchers. After constructing the mound completely, add a thin coating of infield mix combined with Turface over the clay surface to improve traction. This step aids in reducing slip risks during games. To keep the cleanliness and condition of the mound pristine post-match, especially around high-traffic areas like pitching rubber and landing spots, regular application of infield conditioner is vital.
The role of an infield conditioner also extends to preserving ideal moisture levels within the mound which helps in minimizing damage from continuous play. Post-conditioner application maintenance involves smoothing out these areas with a rake followed by moistening them with water. Subsequently letting them recuperate by air drying ensures optimal consistency for future matches.
Protecting the Mound
In order to protect the mound, which has been meticulously constructed with considerable effort, it is essential to cover it with a tarp whenever it’s not actively in use. By doing so, you preserve the appropriate moisture balance and shield your mound from various potential hazards such as weather exposure, unwanted pests, and people walking over it.
It is critical for maintaining consistent moisture levels and safeguarding the structural integrity of the mound that a tarp covers it at all times regardless of whether there is clear skies or inclement weather.
Ongoing Maintenance Tips
Constructing the mound represents merely an initial phase. Its ongoing upkeep is equally essential. Consistent attention to maintaining the pitcher’s mound is paramount, especially with frequent usage—to ensure both player safety and a competitive edge on home turf. To keep the condition of the pitcher’s mound optimal, it’s imperative to undertake regular maintenance tasks including repairing wear after each game and regulating moisture levels using a conditioner.
To address areas that show deterioration, certain steps must be taken.
-
Trimming down elevated spots
-
Backfilling these regions with fresh clay
-
Firmly establishing this new surface layer
-
Ensuring proper hydration and protection are in place to sustain structural soundness of the mound
It’s important for routine inspections of the pitcher’s mound slope to occur as well, utilizing a specific tool known as a ‘mound slope gauge’. This ensures accurate angles are preserved, which if left unchecked could detrimentally affect how games play out.
Summary
We’ve thoroughly explored the steps necessary to create a professional-grade pitching mound, from selecting the perfect spot and dimensions, to shaping the slope of the mound, down to ongoing upkeep. While it might seem daunting at first, our detailed instructions make constructing your own pitching mound achievable. So prepare yourself—grab your tools and get set for some hard work—it’s time you brought your baseball field dreams to life. Play ball!
Frequently Asked Questions
What is the proper distance from the pitcher's mound to home plate?
In Major League Baseball, the standard distance from the mound to home plate is 60 feet and 6 inches. For Little League baseball, this distance is reduced to 46 feet, while it ranges between 35 and 40 feet for Little League softball.
What is the ideal location for a pitching mound?
A level area is the optimal site for situating a pitching mound because it furnishes a steady and flat surface for pitching, which aids in averting player injuries.
How do you ensure the mound is properly oriented?
For optimal mound positioning, it should be aligned in such a manner that an imaginary line extending from home plate, passing through the mound and onward to second base is oriented east-northeast. This alignment prevents batters from having to contend with sunlight interference during play, which can markedly enhance their performance.
What materials are needed for mound construction?
For the construction of a mound, it is crucial to have materials such as clay bricks, high-quality commercial-grade clay, protective mound tarps, tampers for compacting soil, shovels and rakes for shaping and leveling, and wheelbarrows to transport these components. These items are fundamental in creating a robust and long-lasting mound structure.
How do you perform regular maintenance on a pitcher's mound?
To maintain a pitcher’s mound effectively, it is essential to regulate the moisture levels and perform repairs following each session. This includes trimming any elevated areas, replenishing with fresh clay, and firming up the surface. To preserve its condition, water the mound as needed and cover it when not in active use.

 Contact Us