 Contact Us

Best Techniques for Windscreen Installation: A Step-by-Step Guide
Installing a windscreen? This guide covers everything you need to know—from measuring and selecting materials to preparing your fence and securing the windscreen installation. Follow these steps to ensure a flawless and professional installation.
Key Takeaways
-
Windscreens provide privacy, wind protection, and aesthetic enhancement for outdoor spaces, like baseball and softball fields, tennis courts, construction areas, and more.
-
Accurate measurements and preparation are essential for a successful windscreen installation, ensuring a perfect fit and optimal functionality.
-
Selecting the appropriate material and adhering to maintenance practices are crucial for prolonging the lifespan of the windscreen and protecting your investment.
Importance of Windscreens - Do I Need a Windscreen?
Fence screens are multifunctional, offering more than just protection from natural elements. They also improve your time spent outdoors. By serving as a privacy fence screen, they keep unwanted sights out and carve intimate spaces within patios, gardens, or any outdoor area where one might seek the solitude offered by privacy screens.
These screens stand guard against blustery conditions. They not only make your open-air settings cooler during gusty weather, but also act as guardians for your flora against aggressive winds. Their role extends to enhancing visual appeal too — camouflaging less appealing structures and infusing ornamental flair into expansive stretches of fencing.
If you're in the market for a baseball windscreen, check out our collection that features all colors and material types.
Installing windscreens is an economical strategy to boost both practicality and aesthetics in external environments. These barriers defend grasses and botanicals from harmful influences while being versatile additions that suit various applications across private homes or business premises alike.
Measuring for a Perfect Fit
1. Make a Plan

Begin by sketching a simple diagram of your fencing layout. Jot down measurements for each section to maintain organization and avoid confusion later. Labeling or numbering sections, such as "Right Field" or "Right Field Gate," is advisable. Including a directional indicator or noting landmarks can simplify the review and final installation process. Photos are a valuable tool to ensure accurate final results.
2. Measure Length

Start at a corner post and measure the length of your fence from the inside of the left tension bar to the inside of the next tension bar. Keep the measuring tape taut against the fence for accuracy. Avoid measuring from the side with support poles. Account for any breaks or obstructions, like gates, which will require a new section.
For a smooth and professional look, subtract 1-2 inches from your final measurement. It’s easier to adjust a windscreen that’s slightly too short than one that’s too long, which can appear loose and baggy. Note any specific measurements for custom graphics when exact placement is necessary, such as “foul marker 18’6” from left.” For longer runs, we will help determine the best breakdown of screen lengths to achieve your final length.
3. Measure Height

When measuring heights, ensure there’s at least 4-6 inches of space at the bottom to prevent damage during field maintenance. Your fence may vary in height, so measure each section carefully.
4. Measuring Gates

Measure gates using the same technique as the rest of your fence, with one exception: Since gates can open and close (and have ground clearance), leaving a gap at the bottom isn’t necessary. Many customers prefer to match the heights of the surrounding windscreen for a uniform appearance.
5. Angle Cuts & Cut Outs

If your installation requires special angle cuts or cutouts, start with a detailed drawing or photo with notes. Take as many measurements as possible; the more complete the information, the better the end result will fit. Our design department will proof any custom screens to ensure you receive exactly what you need.
7. Putting It All Together

Using the techniques listed above, move clockwise around your fence, noting each adjusted measurement on your sketch as you go. Measure every section—do
Choosing the Right Material
Selecting an appropriate material is essential for the durability and effectiveness of your windscreen, with three main options available: 10 oz. Classic mesh, 16 oz. Armor mesh, and 18 oz. Vinyl materials offer distinct benefits suited to various requirements and settings.
For entities like construction companies, small family businesses, youth sports organizations, and neighborhood retailers, the classic mesh windscreen stands as a cost-effective yet high-quality option that delivers sufficient protection and privacy without being overly expensive. Meanwhile entities such as municipal governments, elementary schools, higher education institutions, and professional venues may find that the armor mesh windscreen provides superior quality along with enhanced longevity on their construction sites.
The decision regarding which material to use should take into account multiple elements including your project’s unique demands and local environmental conditions. When selecting a material, consider its strength, durability, longevity vs costs you are willing or able to pay - thinking carefully about these aspects will help maximize your investment return ensuring what you choose serves well over time.
| Classis Mesh | ArmorMesh- Premium Mesh | 18 Oz Vinyl | |
|---|---|---|---|
| Fabric | Vinyl Coated Polyester Mesh | Vinyl Coated Polyester Mesh | Vinyl |
| Recommended For | Baseball outfields, construction companies, mom-and-pop shops, little leagues, local stores | Baseball outfields, townships, grade schools, colleges, pros | N/A |
| Features | Top-seller | Most durable, for high wind areas | N/A |
| Printable | Yes | Yes | Yes |
| Warranty | 3 years | 5 years | 4 years |
| Weight/Sq. Yd. | 10 oz. | 16 oz. | 18.0 oz. |
| Price Level | $$ | $$$ | $$$ |
| % Shade | 88% | 85% | 100% |
| IncrediSeal | Yes | Yes | N/A |
| Air Flow | 340 CFM (ASTM D-737) | 744 CFM (ASTM D-737) | N/A |
| Tensile Strength | 230 X 200 (ASTM D-5034) | 351 x 333 (ASTM D-5034) | N/A |
| Tongue Tear Strength | 100 X 110 (ASTM D-5587) | 69 x 60 (ASTM D-5587) | N/A |
| UV Resistance (% tensile strength retained after 1000 hours) |
83% | 96% | N/A |
Customizing with Artwork
The process of installing a custom windscreen offers an exhilarating chance to infuse it with your unique artistic flair. By opting for a personalized design, you elevate the visual charm and inject individuality into your space. It is crucial to select vector-based logos for their crispness and professional look as they avoid pixelation. Using high-resolution images is equally important to ensure that the printouts are free from blur and maintain their sharp quality.
When devising your custom windscreen’s design, be mindful of its height relative to the dimensions of any text or emblems incorporated in it. As an example, on windscreens standing at six feet tall, lettering should ideally span about 60 inches in size. Conversely, on five-foot-high windscreens, opting for letters that measure around 48 inches would be most fitting.
Personalizing your windscreen does more than just boost its aesthetic value. It serves as a canvas on which you can proudly display branding elements such as logos or textual content—making it a testament to either personal style or corporate identity.


Custom Windscreen Color Options
Keep up the team spirit and pick your team colors for your windscreen. We offer Forest Green, Royal Blue, Black, Red, Navy Blue, Orange, Maroon, Caroline Blue, Brown, Tan, Purple, Kelly Green, White, Gray and Yellow.

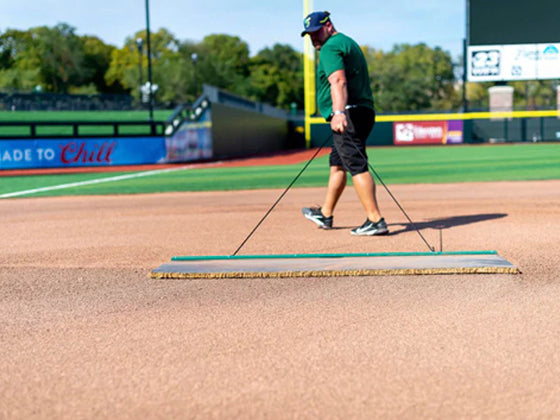
Preparing Your Fence for Installation
Ensuring your fence is in good condition is vital prior to the installation of your windscreen. Conduct a detailed examination for damage and address any repairs needed to support the windscreen, preventing complications in future steps. It’s also important that you clean your fence thoroughly, eliminating all dirt and debris for an unobstructed installation process.
Laying the groundwork by preparing meticulously guarantees that the installation will be done correctly and yield optimal outcomes. Dedicating time to both inspecting and cleaning before you begin installing will facilitate a more efficient process while contributing to enhanced performance and extended durability of your windscreen.
Attaching the Windscreen to Chain Link Fences
Attaching a windscreen to chain link fences requires careful planning and execution. Begin by gathering all necessary materials, including zip ties and adequate tools. Choose a calm day for installation to avoid complications caused by wind. Start the installation from the upper-left corner and progress systematically to ensure the screen is square and free of wrinkles.
Secure the windscreen using UV-treated tie wraps, attaching at every grommet and using a separate cable tie for each grommet to avoid damage. This method helps keep the screen taut and ensures it stays in place even in high winds and wind load conditions. For the best results, use lighter tie wraps at the top and heavier ones at the bottom to allow for flexibility in high winds.
Avoid over-tightening the cable ties as this can damage the material. If you’re using hog rings or nylon twine, be cautious as they may not allow the material to break away in high winds, potentially causing damage to both the screen and the fence.
Following these steps ensures your windscreen is securely attached and functions effectively.
Maintenance and Care
To ensure the longevity and continued effectiveness of your windscreen, it is crucial to perform regular checks every few months. By conducting these inspections, you can identify any maintenance needs early on. Cleaning should be carried out routinely using water with a gentle biodegradable dish soap for best results. To avoid damaging the screen’s material, refrain from employing a pressure washer.
Since various materials used in screens may necessitate distinct cleaning agents, selecting the right product for your specific screen type is vital. Prior to cleaning the entire area, do a spot test on a small section of the screen to confirm that there will be no damage caused by your chosen solution. If any part of the screen sustains damage such as holes or tears, repair kits are available that can patch up these areas effectively.
To these care measures, if you find that parts of your windscreen have become loose and begun flapping around secure them back onto each grommet along the fence. This action helps preserve both its aesthetic appeal and function efficiently over time. These steps in upkeep assist in ensuring that your windscreen remains sturdy and functional thereby consistently offering privacy and shelter within an outdoor space.
Warranty Information
It’s crucial to comprehend the warranty details of your windscreen to safeguard your purchase. Warranties typically provide coverage for replacements due to material or craftsmanship flaws encountered during normal usage within the specified timeframe of the warranty. Certain exceptions might be in place such as damage resulting from careless handling, unauthorized alterations, or issues not stemming from product defects.
Warranty periods vary based on the type of product and may span anywhere between 3 to 5 years. Installation kits for hardware often come with a lifetime guarantee. Customers wishing to initiate a claim under their warranty must complete an RMA form so that it can be evaluated and addressed accordingly.
Any products issued as replacements will carry over whatever is left of the original item’s warranty period. Being knowledgeable about what your warranty covers ensures you are adequately shielded and prepared to manage any complications should they occur.
A Few Reasons to Buy
Lead Times - 5-10 business days for unprinted screens and 10-15 business days for custom printed screens
Proofs - We will provide you with a proof of how your custom windscreen will look before you pay anything.
Warranty - 3 year warranty on Classic Mesh screens, 5 year warranty on ArmorMesh screens and 4 year warranty on 18 oz vinyl mesh screens.
Made in the USA - All custom windscreens are made right here in the USA!
Summary
In summary, installing a windscreen involves several important steps, from measuring and choosing the right material to customizing with artwork and preparing your fence. By following the guidelines provided in this blog post, you can ensure a successful installation that enhances both the functionality and aesthetic appeal of your outdoor space.
We hope this guide has provided you with the knowledge and confidence to tackle your windscreen installation project. With the right preparation and attention to detail, your windscreen will provide privacy, protection, and beauty for years to come.
Frequently Asked Questions
What is the purpose of a windscreen?
A windscreen is designed to reduce disturbances and improve privacy by establishing a partition that divides various spaces. This effectively helps create an environment that is both tranquil and private.
What are some benefits of having a windscreen?
Having a windscreen offers significant benefits such as enhanced privacy, improved aesthetics, protection against wind during outdoor activities, and safeguarding plants from adverse weather conditions.
Overall, it serves as a cost-effective solution for both functional and decorative purposes.
How should you measure the length for a windscreen installation?
To ensure a proper fit for a windscreen installation, measure from the inside of the left tension bar to the inside of the next tension bar, subtracting 1-2 inches to accommodate for a smooth appearance.
This approach will help you avoid complications during installation.
What should be accounted for when measuring the height for a windscreen?
When measuring the height for a windscreen, it is essential to include an allowance of at least 4-6 inches at the bottom to avoid potential damage during field maintenance.
This precaution ensures the durability and longevity of the installation.
What is a critical guideline for installing a windscreen?
A critical guideline for installing a windscreen is to attach it at every grommet and utilize a separate cable tie for each grommet to prevent damage.
Following this practice ensures secure and effective installation.